Monday, March 20, 2017

Pan-seared Brussels Sprouts & Weekend Shenanigans

I hope you all had a lovely weekend. As for me, my weekend was pretty busy and kinda hectic. Our toddler was sick with what I had a few weeks ago but her symptoms were worse than mine. We had to take her to the doctor and they placed her on an antibiotic which kinda broke my heart. This is the first time she has EVER been sick. She is almost four years old and has never had to go to the pediatrician because she was sick. She has had a stuffy nose one or two times but this time our baby was truly sick. She woke up one morning and said, “I don’t feel good mommy” and my heart literally ached. I tried everything I could to not pass my cold onto her but with the hubby working, it seemed unavoidable. So we spent the weekend cuddling, watching Frozen and Rio, and snuggling. Since taking the antibiotic she feels so much better. The congestion is much better and she told us she is feeling better. Don’t you just hate it when your babies are ill? They look so helpless and miserable and it really breaks my heart. I am really glad she is feeling better and playing around the house like her old normal self. 

Besides taking care of my babies, I managed to prep for a few photography sessions I have this week. I am so excited and I can’t wait to share a few images with you guys on here. I am still learning and growing as a photographer but the more I practice, the better and sharper my images will be. I have a newborn session and I think that is the one I am the most excited about because newborn photography is the area I am most interested.

After prepping for my sessions, I started our Sunday dinner. On the menu we had: brussels sprouts, three cheese macaroni, and fried chicken. I think this menu is as southern as it gets. I have vowed to watch our fried food intake but Sundays are usually a cheat day where we eat what we want so let the wing frying begin! 


I pulled out my bag of brussels sprouts I purchased for $1.99 at Aldi, cut up some bacon, and tossed it all in the skillet. The smell of bacon makes my mouth water. I added some salt, pinch of sugar, garlic powder, and a few splashes on water once the brussels sprouts were half way done. I place a lid on the skillet to let them steam a bit and turned off the heat and added a tablespoon of shredded parmesan cheese. They still had a little crunch to them and they had so much flavor. I placed them on a plate along side my three cheese macaroni and fried wings and dinner was served. The hubby loves southern meals like these so he was all smiles! :


Pan-seared Brussels Sprouts 

Items needed
1 bag of fresh brussels sprouts already washed 
1 strip of bacon or 1 slice of prosciutto chopped into pieces (you can cook bacon beforehand and add after brussels sprouts are done or you can cook with brussels sprouts) 
Salt to taste
Garlic powder
Pinch of sugar
Tablespoon of shredded parmesan cheese


Directions


Trim ends off of brussels sprouts. Cut in half lengthwise through the stem end. Cut up bacon or prosciutto and toss in pan to start cooking on medium high heat. Once bacon starts sizzling and cooking add brussels sprouts, salt, garlic powder, and sugar to pan. Turn down heat and cook on medium heat. Stirring occasionally to ensure all sides of brussels sprouts are cooked and bacon doesn't burn. After about 3 to 4 minutes once bacon fat has rendered and both sides of brussels sprouts are browned (light to medium in color) add 1/4 cup of water and place lid on (ajar) to steam for another 4 minutes or until tender yet still crunchy. Water should pretty much have evaporated at this point. Remove lid and sprinkle parmesan cheese on top. Enjoy!


Thursday, March 16, 2017

Tangy and Zesty Chicken Pasta Salad


Last week I was hankering for something zesty and tangy. Weird huh? I am not pregnant :-). I just wanted to put that bit of information out there. Anyways, so since I had this craving I decided to make a simple pasta salad recipe my sister shared with me. This literally is one of the easiest yet tastiest recipes and what makes it even better is it doesn’t take much time to prepare at all. If you are like me, you don’t have a ton of time everyday so quick dishes like this will be right up your ally. 

Be prepared for your tastebuds to be tantalized. 


Alls you need is: 

Tri-color Rotini pasta
Zesty Italian Dressing 
Cooked chicken breast chopped to your liking
Feta cheese crumbles 
Mini sweet peppers chopped finely 


Directions:

Bring water to a boil and toss in rotini and cook until al dente.
Cook chicken breast until done. 
While chicken is cooking, you can chop up your washed sweet peppers, removing the membranes, and set aside. 
Once chicken is finished cooking, allow to cool, and then chop into small pieces. Once noodles are done, drain and toss in a bowl. You can let the noodles cool if you want. I like to let my noodles cool a bit so I usually start cooking my noodles before I start the chicken. 
Once noodles are cooled a bit, toss in chicken, peppers, and add your zesty Italian dressing. 
Top with crumbled feta cheese. 


Enjoy!


Oh and here is the letter C my sweet baby worked on :-)


Tuesday, March 14, 2017

Spring Tablescape

Anyone ready for spring time? My two favorite seasons of the year are Autumn and Spring. I love Spring and get excited every year when it rolls around. There is just something about seeing the barren trees and bushes no longer barren but full of beautiful bright green leaves and colorful flowers. I know for some with allergies Spring time is a nemesis. My brother has allergies and fresh cut grass and pollen makes him sneeze uncontrollably at times. My heart aches for him at times because his eyes are so red and his throat itches. So I know not everyone loves Spring but I absolutely love this time of year. To prepare for the season change I am finishing another round of deep cleaning. I plan to pull the stove out and clean behind it and clean under all of the beds. I also have been organizing and planning outings to take our daughter on during the day. Our town has some pretty good events, theatre shows, and more for toddlers to enjoy, so I plan on doing more outings since the weather will be nice and pretty. 


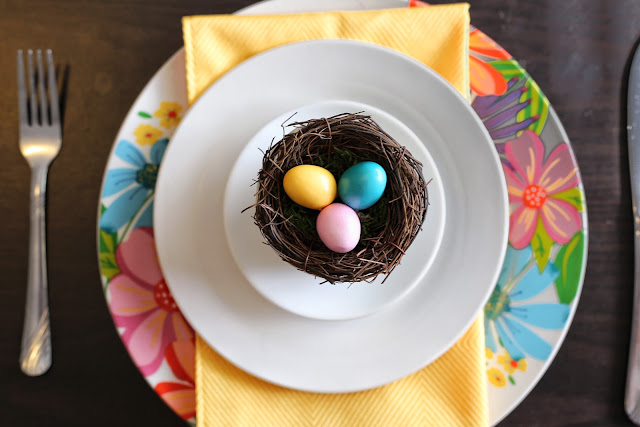
I also decided to work on a Spring/Easter themed tablescape. The challenge was to not spend over twenty bucks and I am happy to say I succeeded! Yay! So, I want to share my simple and savvy tablescape with you and how I stayed on budget by getting most of my items from the Dollar Tree! Yes, the Dollar Tree! Don’t you just love the Dollar Tree! They had these pretty dinner plates with matching mugs and when I saw them I instantly thought of Spring. The fact that they were only one dollar made this find even sweeter. I also grabbed some yellow placemats to compliment the yellow in the plates.


I found some cute white dishes with bunnies on the front of them at the local thrift store. I LOVE the thrift store and purchase a variety of items from them quite often. My place setting was still missing something in my opinion so I decided to pay good ole Hobby Lobby a visit for some inspiration. The day I decided to go was the best day ever because they had forty percent off all of their Easter items. I ended purchasing a set of four nests that came with eggs and green moss for under three bucks and my Spring/Easter tablescape was complete! 


If you need white saucer plates, visit your local Dollar Tree or thrift store. Walmart even has some for under a buck. You don’t have to spend a ton of money to create something beautiful this Spring. Happy decorating you guys! 

Sunday, March 12, 2017

Newborn Photo-shoot


Ok so this past week, I did something so exciting and very fulfilling! I had my first official newborn photoshoot. Yes! I am still bubbling over with excitement. I love photography. Well, wait, let me preface this by saying, I didn’t know how much I loved photography until I picked up a camera and started taking photos of food.

 
I have always been familiar with and intrigued by photography but felt really intimidated. My dad is a photographer and my husband is a professional photographer and videographer. So I have been around cameras and seen the editing process for years but it wasn’t until I mustered up the courage to give photography a try. I believe that we as people will never now what we are meant to do or what we are good at if we fail to try new things. Fear and intimidation keeps a lot of us from trying new things and experiencing the joys that come along with discovering something new. If you try something new and it doesn’t work, that is ok too because at least your tried. I admire the person who tried and didn’t succeed vs the person who never tries anything because of fear. 


So, my love for photography all began when I started taking pictures of food and I instantly fell in love with photography and felt pretty much like a fish in water. There was an immediate connection there and I loved how I could use photography to create art. I would show my husband and dad my shots (they are realist and blatantly honest) and they both were amazed at my shots, especially since I a a beginner. They would also give me honest and raw feedback that helped me perfect my shots, lighting, and angles. Their input was and still is extremely valuable and it helps me grow as a novice photographer. They have been working in the field of photography for many years and they know the ins and outs. My husband is a graphic designer so he is really good at editing and angels so I am surrounded by two of the best trainers in my opinion. I used what they have taught me along with two widely known photographers that I follow on YouTube and applied it to my first newborn photoshoot. 


Needless to say, I was so excited about this photoshoot, I did a ton of research, and I watched a ton of videos. Although, I watched a ton of videos on newborn safety and etc., I wasn’t extremely, confident about doing some of the popular poses with the newborn. So, I focused more so on staging, background, her attire, and angles. I also didn’t run out and purchase a lot of stuff. One of the photographers I follow advised against doing so and I agreed with her words of wisdom. Why go out and purchase all of these things when you are just starting. I plan to purchase a little here and there along the way, only purchasing the necessities. I didn’t have a ton of props, I pretty much used items I already had around the house. So for this photoshoot I brought a basket, white sheet, white sheer, a reflector, three textured blankets, a diaper cover, faux pearls, a beanie bag, and my husbands light lamps. Since all of these items were around our home, I only had to purchase a headband and some stretch fabric for wrapping from good ole Hobby Lobby all for under 6 bucks! That was my only expense so I think I came out pretty good and the photos turned out lovely!!


The parents were so ecstatic about the photos and I was pleased. The baby is absolutely beautiful and I learned a lot during our 3 hour session. I learned to work through the cry, to go with the flow, oh and to be flexible. My husband said I did a good job calming and soothing the baby and maintaining a professional yet nurturing disposition while working with this sweet baby girl. I really felt like I was in my element and I can't wait to do another newborn photoshoot again. 


As a perfectionist, I plan to only hone in on my skills even more and it is my prayer that the Lord blesses and favors my newest hobby. I am in no way a pro at this but I am enjoying learning and the experience. 
Isn't she adorable!!!


Anyways, I have a food photoshoot in a week for an awesome local baker, so I am excited to be photographing the thing that made me fall in love with photography....food! 


Tuesday, March 7, 2017

Motherhood. The memory zapper

Hoping you guys are having an awesome and productive day! I also hope you had a great weekend and started this week of right. As for me, I'm not going to lie, last week was quite hectic and I was so over it ALL. I was ready for the weekend. Our toddler at times has been really resistant and also has been pushing the limits. When I ask her to do something she responds with, "No! I cant!". What? Who is this little person giving me adult like responses and pushing my buttons?? She and her brother have been fighting their nap times, which causes her to be cranky and irritable. Our baby boy has been pulling everything down that he can get his hands on, ramming his walker into his sister, which causes her to dramatically scream bloody murder. On top of that I found some sort of bug in our house last week so I have started cleaning like a mad woman all while fighting off a sinus cold. I. Was. So. Over. It. All. Ok my rant is over :) Oh plus I have been forgetting things a lot lately.


Since having babies, I have been prone to forgetting things a lot and since we added another baby to the mix, my memory seems to have gotten worse. Before having babies, I loved planners and I owned several. I didn’t necessarily need my planner, I just loved writing out my plans for the week and month. Well, since having babies, I literally rely on my planner and reminder notification on my IPhone.

Last week I slacked on writing in and checking my planner and let me tell you, I forgot a number of things! I forgot some really important dates…for one, my baby boy’s doctor’s appointment. Yikes! I was totally off for the week and I realized I wasn’t notating important dates and checking my planner daily. I pride myself on being organized and my planner helps me stay on track. I have accepted that my memory isn’t as sharp as it used to be before children. Nowadays, I can barely remember what I wore the day before and if you asked me where my keys are, I have the slightest idea. What is it about motherhood that zaps your memory and causes you to forget even the simplest things? If you are a new mom who is forgetting things you used to remember, my advice…get a planner and set reminders on your phone. I set reminders on my phone to go off two to three times for just one event. One reminder isn’t enough so I set multiple reminders and this really helps a lot. I still forget things here and there but it’s not as bad when I am checking my planner and paying attention to my notifications. If you take a look inside my planner you will see that I have even the most mundane tasks written down. I do this because it helps me stay organized. When you are a mom, organization is pertinent if you plan on achieving anything on a day-to-day basis.


My planner costs me about four bucks and it is really nice and simple. You don’t have to spend a ton of money on a pretty planner. Anyways, how do you moms stay organized and avoid forgetting things all of the time?


Friday, March 3, 2017

Homemade pectin free strawberry jam

Anyone else love the Cosby Show? I adored Clair Huxtable and wanted to dress and be like her in so many ways. She was so gorgeous, elegant, classy, intelligent, sharp, and a fantastic mother. Anyways, I decided to make some strawberry jam this week and I thought about the episode featuring Stevie Wonder. If you remember the episode, you remember Theo saying, “Jammin’ on the one” while working on a song with Stevie Wonder. For some reason Theo’s line, “Jammin on the one” came to mind as I was cutting up my strawberries.


This is my third time making homemade strawberry jam and it literally is a simplistic recipe. All you need are three ingredients: strawberries, sugar, and lemon juice. It’s so simple and I believe you and your family will love eating something made with fresh ingredients. So many of the foods we consume are filled with preservatives, artificial dyes, and other ingredients I can’t even pronounce. I can’t help but wonder if what we are consuming is behind the high rates of cancer and other sicknesses within our country. Since having children, I cook a lot more using fresher ingredients and I have challenged myself to learn recipes that have been passed down from generations. It’s just something about the way my grannie used to cook and bake. She could take a little and make something gloriously delicious. My grannie was recognized as the biscuit queen within a small local town because her biscuits were so moist and fluffy and she didn’t use a biscuit cutter. I still don’t know how she formed her biscuits by hand and they turned out perfectly round every time. It is my desire to provide meals that create wonderful memories for my children and their children just like my grannie.


So here’s to cooking homemade jam and to being moms who endeavor to make home the happiest and the healthiest.  


Ingredients for pectin free strawberry jam

2 cartons of fresh strawberries
1 cup of sugar to start with (I taste and add more sugar to my liking throughout the process)
2 tablespoons of fresh lemon juice (more or less to your liking)


Items needed

Mason Jars with lids...you can find jars at your local Dollar Tree!


Directions

Start your water bath for your mason jars. Gently boiling your jars in a pot helps to sterilize the jars. Click the link for more instructions on sterilizing jars for canning.

Cut tops off of strawberries, remove the hull, cut into chunks, and place in bowl. Use a fork to mash strawberries a bit and put strawberries in a pot. *Word of advice, if there is a ton of juice from mashing your strawberries, pour some of the excess off. This recipe doesn't use pectin so the extra moisture can take your jam longer to set.*


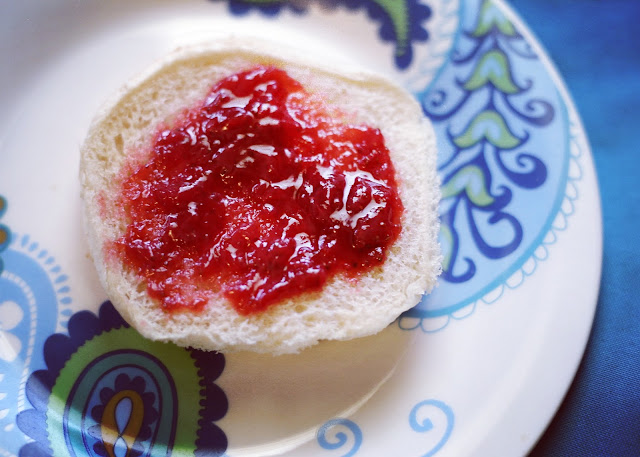
Pour in sugar and lemon and bring mixture to a slow rolling bowl. Cooking on medium for about 10 minutes. Stirring occasionally and skimming off any foam. I used my candy thermometer the first time but learned how to use the good ole plate and spoon test. Place a spoon and small saucer in the freezer before you start cutting your strawberries. Between 8 and 10 minutes, you can take some of the jam and place it on the spoon or plate and if it gels to the plate or spoon (isn't runny) and looks like jam, you are done! If not, cook an additional 2 to 3 minutes and test again on the either the spook or plate you didn't use the first time. Once strawberry jam is finished, pour jam into warm mason jars and remember to wipe rims with moist towel. Place your lids on and screw on your top and you are done. We use this jam on our breads for breakfast and in my husband's hot wing sauce recipe. It tastes divine!


****
Now let me preface by saying, my jam is made to eat immediately and stored in the fridge up to about 2 weeks. So, once the mason jars are filled, I don't place them back in the water bath to seal the jars. I usually just turn them upside down but you don't have to do this if you plan to eat yours immediately. Canning long term is a sensitive process that must be adhered to, so be sure to check out the link on the canning process. ****